Long Arm Quilting

Tuesday, April 21, 2015

Soul Searching Quilt


I also have this fabulous quilt to chat about. Ibby made this one using Kathy Doughty's pattern from one of her new books Making Quilts. That link may not work.


I had a blast quilting this one. Straight lines and swirls are best friends in my opinion...soul mates if you will.


I am kinda wild about how it turned out. I custom quilted it.


I also think Ibby has one stellar collection of low volume fabric.

Happy Quilting Folks!
Tia


Ahoy! A Pirate Quilt


Hey there! I hope you are doing well. I want to show you one of the quilts I quilted recently. Isn't this a fun quilt for a little boy? I quilted this for Rosalind. She got the pattern a couple years ago from Material Obsession (in Australia) I looked for a link but in my quick search didn't turn anything up. I bet you will be more successful.


She wanted me to custom quilt it. I took it chunk by chunk. I wanted each area to look like thematic. Does that make sense? That can be either wind or currents of the sea. The sharks are swimming in the ocean = waves.


This center spot was tricky because Rosalind had already stitched on all these little pieces of treasure. No quilter ever likes quilting around beads and buttons. I am no different. I could have quilted this with a great deal more detail, but all that loot made me rather timid.


I quilted it to look like contour lines. 


I quilted enough to make it not puff too badly after it is washed.


And I think the sharks are mighty cute!


Happy quilting folks!
Tia

Monday, April 13, 2015

Sharing my "Story" - and a giveaway!


Hello there and Welcome to my stop in the Story blog hop. If you are new to my blog welcome! I am Tia Curtis, a pattern designer and long arm quilter. I met Carrie Bloomston 4 years ago when quilt market was in Kansas City. In the hustle and bustle of quilt market her booth was a nice place to stop and breathe. She just has the most soothing vibe. I felt like I had know her all my life. I just dig Carrie! This is also the third year I have sewn for her out of her fabulous fabric. You can see the post about Collage HERE and the one about Paint HERE. She sent me her Story collection and said to do whatever I wanted. With just a peek I knew exactly what I wanted to do.


As you can see a lot of great makers created fantastic quilts with this saturated collection. I just love the depth of the colors.


This first project I want to talk about and share my story is the "Phase of the Moon Hipster". This bag was really designed for my 13 year old daughter (and your tween daughter). It has a "secret" pocket so she can hide her pads when it is that time of the month. This would totally humiliate her - forgive me please Emma! The adorable little girl above is not my daughter, just so you know. She looks too young to me to be menstruating...but I started when I was 9 so who am I to judge?


This little bag has a main zipper compartment, and outside slip pocket and the hidden zipper pocket that isn't really hidden at all. I made a little reverse applique moon for the front. If you want to really get into the spirit you can make one for each phase of the moon.


I grew up with 2 sisters, my mom and my dad. We were all very close and for one week of the month my father complained loudly that we were all almost impossible to live with. If we would have any grumpiness or complaint at all he would make this big deal about stepping outside to check the phase of the moon and letting us know that we were all about to start sloughing. It kinda ticks me off a bit even now, but it really enraged all four of us females at the time. I swear if he would have known about the Red Tent he would have erected one in the yard and made us all go outside. For a man who is pretty much perfect in my eyes that was his one flaw. He mocked our periods.


So without further ado or hopefully TMI - I give you the Phase of the Moon Hipster. I have written the pattern for this bag, I am just waiting to see how I want to release it. All young ladies need a bag to hide their pads.


Here is a process shot of me working on the moon. Reverse applique is really delightful. Here is a tip...If you match your thread to your shape or background your stitches will look better and people with think you are really smart. Which I am sure you are.


Next up is "Dad's Tulips" - I am embarrassed to admit that I can't recall what I named it when I sent it off to Carrie, so if you see it named something different sorry. It is the same quilt...just with an alias.


I am a sucker for large scale applique. I find the process so soothing to work on. I went to the Quilt Study Center in Lincoln, Nebraska and there was a stunning display up featuring 4 block applique quilts. I have been a fanatic ever since. This is the second I have designed for Carrie's fabric. Upon reflection I do wish I would have selected a different print for the leaves, but I forgot to ask for a green and the ones that I had just didn't want to work.

So, another story about my dad. We grew up in Germany. Dad was in the Army. My father has always loved working in the garden. He had the Yard of the Month all the time - Especially in the spring when all his tulips would burst from the earth in their riot of laughing colors. His favorites were the Black Tulips that he went all the way to Holland to select the bulbs from an old Dutch master Gardener. He also loved Grape Hyacinths. So this quilt is my dads favorite flowers. Black tulips and grape hyacinths.


I am not wild about how I quilted it, but oh well, it is done now.


These were so fun to work on. I insisted on doing the applique as needle turn because I like it better. But this pattern will be easy to do as fusible too.


Last but not least is "Night Flight". In my mind these were flamingos flying at night, but everyone else thinks they look like Rockets. I love the contrast of the hot pink with that deep, rich blue. And wonky stars are one of my very favorite quilt blocks EVER. Period.


This quilt was absurdly fun to make. I fussy cut strips of Carrie's Half Square Triangle print to do the inner border


The Flamingos are made like you would make a flying goose block, but they are taller...and they have funny legs. I quilted feathers in them too. BUT...If you want them to be rockets that is fine too. The legs are the exhaust as the rockets are blasting off.


I had a blast quilting it of course. I used some new to me batting Quilters Dream Cotton in Supreme loft. It is soon heavy and very dense. It quilted like a dream.


Here is Sam (he is named after my dad) and he grabbed this quilt up as soon as I came in from taking pictures of it. He insists they are rockets.


This is an in process shot of making this "Night Flight" quilt.

OK, folks. Those are my Stories to go along with what I made for Carrie's Story fabric. I could go on for hours, but I don't know if anyone would read my words and I have quilting to do.

The glorious Carrie Bloodstone is giving away to 3 lucky readers a fat quarter bundle of Story and a copy of her super inspirational book The Little Spark. You MUST go over to HER BLOG to comment to win. I would love to hear a comment here too, don't be shy.


Follow along on Facebook, Instagram and here on the blog. Ask your local quilt shop to carry Story. It ships to stores in September. In fact, email them this post so they can order it from their Windham rep today. Share the love! Tweet it, Pin it, Instagram it and Facebook it! Share pictures of Story! Tag Carrie (@suchdesigns on Instagram) and always use the hashtags #sewyourstory, #storycollection and #carriebloomston.

I was with my friend Rocky when she ordered the Story Collection for our quilt shop in town (Meadows Quilting and Sewing) I was super excited to see it all laid out in the back room as samples along with the little look book with my projects featured. So cool.

OK, folks. Go forth and comment and spread the love!

Have a happy week,
Tia Curtis


Thursday, April 9, 2015

Making a Leaf Wall hanging - A Tutuorial


Hey there! Welcome to my blog. If you are visiting from Instagram Welcome! I am thrilled you are here. OK, today I want to show you a quick tutorial on how I make my little leaf quilts. They are 100% inspired by the amazing UK artist Ingrid Press. I first saw her work back in 2009 and fell madly in love with her simple style. I HAD to make one for myself that very day. I am not sure how she goes about her process, but I know how I do mine so I will show you my technique.


First this is Ingrid Press. Isn't she a handsome woman. So dignified. Behind her are some of the quilts she has made. I searched the web for these images. Sarah Fielke had done an interview with her for her Sewn website but I couldn't find that link. The website must be gone. So sad. It was a really good interview.


Here are some more of Ingrid's leaves


And here even more.


I went through quite a kick making quilts inspired by Ingrid Press. This is a baby blanket I made and then gave to someone. I can't recall who, but I do know I never got a thank you. Oh well. I don't give my stuff away any more. Took me some time but I finally learned.


So, are you ready to get started? The first step is to make a quilt sandwich. Then cut out your leaf shapes. I just cut mine straight from my green scrap bag. After I have cut the shapes I pin baste them to the quilt sandwich. Make sure your pin passes through all 4 layers (leaf, top, batting and back). This is the only basting to do. No spray, no thread...just some safety pins.


See. Pretty easy so far.


Now, remove the pin from whichever leaf you are going to begin with. With your free motion quilt foot and your feed dogs lowered, pull the bobbin thread up to the top of the quilt by taking a single stitch. This is key to keeping the back looking nice.


Take a couple stitches in place and quilt your stem line up to the top point of the leaf. This one curves a tad. Yours doesn't have to. I used Black thread so you could really see the stitching. Please feel free to match your thread to your leaves.


I got carried away and quilted this one without taking pictures. The quilting isn't perfect, the black thread was really heavy so it left big knots on the ends of the veins, but I like it.


We will go slow here. See, I have quilted the center stem and traced over my stitch line to quilt the top two veins, traced over the stitch line again to come down to where the next set of veins will go.


Just carry on in this way until all your leaves are quilted. 


Next you can switch out your thread to match your background. I just did simple straight line quilting.


Obviously this is a different quilt. I was finishing this one before I thought to take pictures.


You quilt right through your leaves. It really isn't too noticeable if your tension is good, which mine isn't. I need to have my Bernina cleaned and serviced.


So there. All done. My next tutorial will be on how to do a Facing Binding. I think they are pretty swanky and if you have never tried you should give it a go on something small.

I would love to see what you make if you decide to make a leaf quilt of your own. Tag me on your instagram!

xo,
Tia Curtis

KCMQG Quilt Retreat in Hamilton

Hey there!
Are you ready for a million pictures and a brief tour of the quilt shops of Hamilton, MO? The home place of the Missouri Star Quilt Company (empire). It is awesome. Most of us know Jenny Doan from her super helpful and clear Youtube Tutorials. Well she and her family own and operate operate one heck of a collection of quilt shops in the tiny town of Hamilton, MO. My Quilt guild (KCMQG) went on our weekend retreat there 2 weeks ago. There is a retreat center that sleeps 37 and it was fabulous.

OK, Lets begin!


This is now the main shop. It is in it's third location (I think). They keep moving because they keep filling it with fabric! So they decided to buy a bunch of the store fronts along the main street, renovate them and turn them into individual quilt shops divided up into types of fabric. The main store has all my favorite designers (Amy Butler, Anna Maria Horner, Denyse Schmidt, Carrie Bloomston, Kaffe Fassett, Carolyn Friedlander....the gang is ALL there) In this shop you will also find the legendary Daily Deal and many notions. At the front of the shop is a resting spot for weary quilters to watch Jenny Doan preform her quilt magic.


The newest shop is the Solid and Basic shop. It is in the old JC Penny building. It has the original wood floor and exposed beams. It is so pretty with all the fabric in its proper spot in color order. I love it.


Next is the novelty shop. Any novelty you can think of. But no Japanese prints.


This is another building they are renovating. It will be a welcome center and Spouse lounge.


The 4th shop is the batik shop. Its walls are lines with brilliant Jewel tones batiks. And it smells like the beach. Coconut and sunblock.


Shop number 5 is the seasonal shop. Christmas, Valentines day and Halloween are all here in abundance. Notice the original tin ceiling and our Tour Guide. He is a Father in Law of one of Jenny's Children. The WHOLE family is involved in this endeavor.


Shop #6 six is the Public Library...or Quilting stable. Behind these doors are 7 Gammill long Arms with Statler Stitchers. and about 4 billion quilts to be quilted. I wish I had a fraction of that number to do.


This is what the inside looks like. It has not had much renovation. They have 3 more long arms in an old shop waiting space to be set up in and 4 more on order. Eventually they will have 14 Statlers. WOW.


Here are SOME of the quilts waiting to be quilted. Part of me wanted to take a couple and quilt them myself. BUTTTTTT I was there to relax and get my own sewing done. Not work.


They don't baste the quilts which I found really odd, but obviously they are doing WAY more business then I, so they must be doing it right. I will still baste though. This Quilting Library put me and Jess in a state of mild shock. So many quilts! So many machines! I guess I am still in shock when I think about it. So impressive.


The last shop was the reproduction shop. Civil war and feed sacks galore. Look at all those precuts!


The front window in this shop was really pretty. All the windows really were fabulous.


I neglected to take many pictures of us actually doing stuff...but here we are having an ice breaker. Getting to know one another.


Oh, let me jump in here about the food in town. COME HUNGRY! the Blue Sage is so so so so so so so good. I had a grilled chicken and coconut salad for dinner and I swear it was the best salad I have ever had. My mouth was quivering with delight. For lunch I had a rocket salad that as fabulous too. The chef is from Salt Lake City and Jenny brought him to town. I kept thinking my kids would love how very Gordon Ramsay it is.


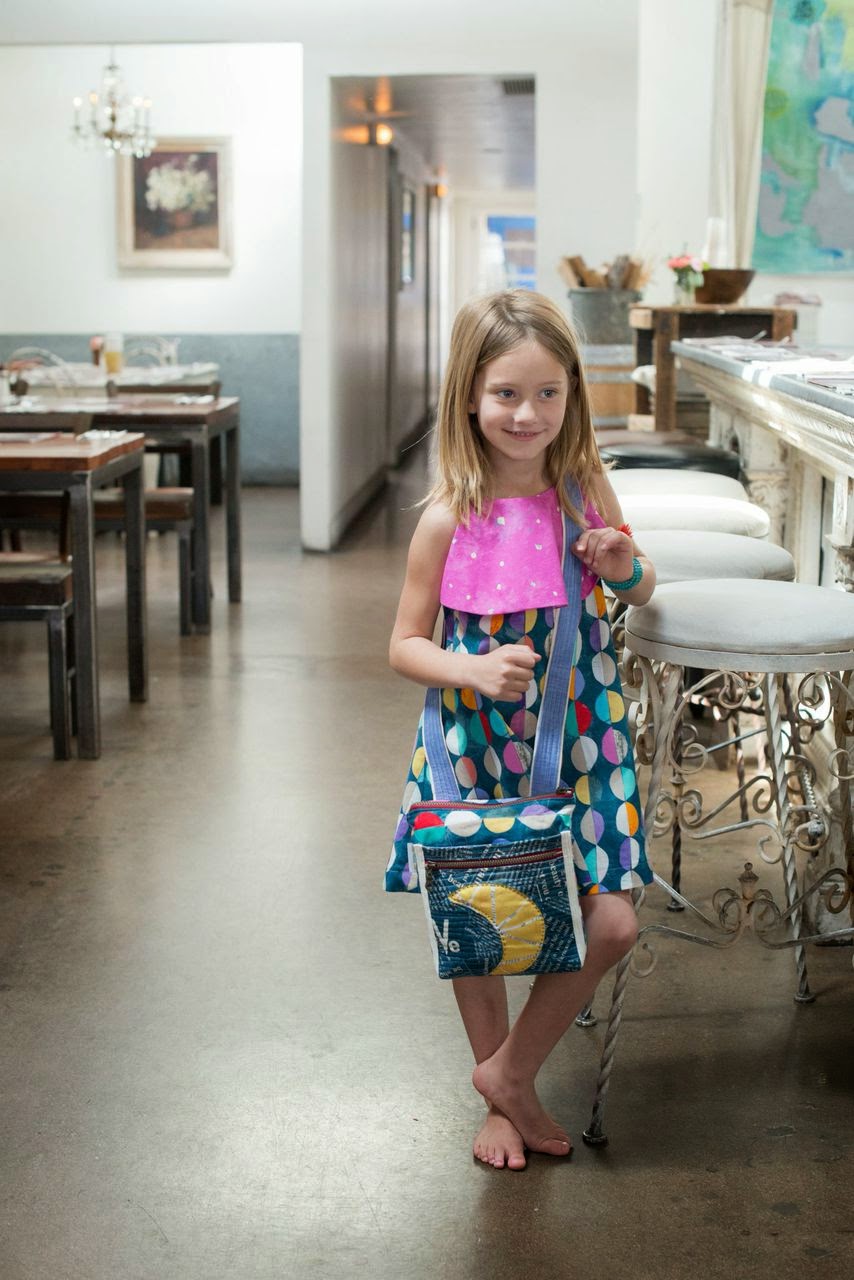
I got to teach a quick class on my very favorite way to put in a zipper, so all who wanted to made little quilted zipper bags.


Here are some


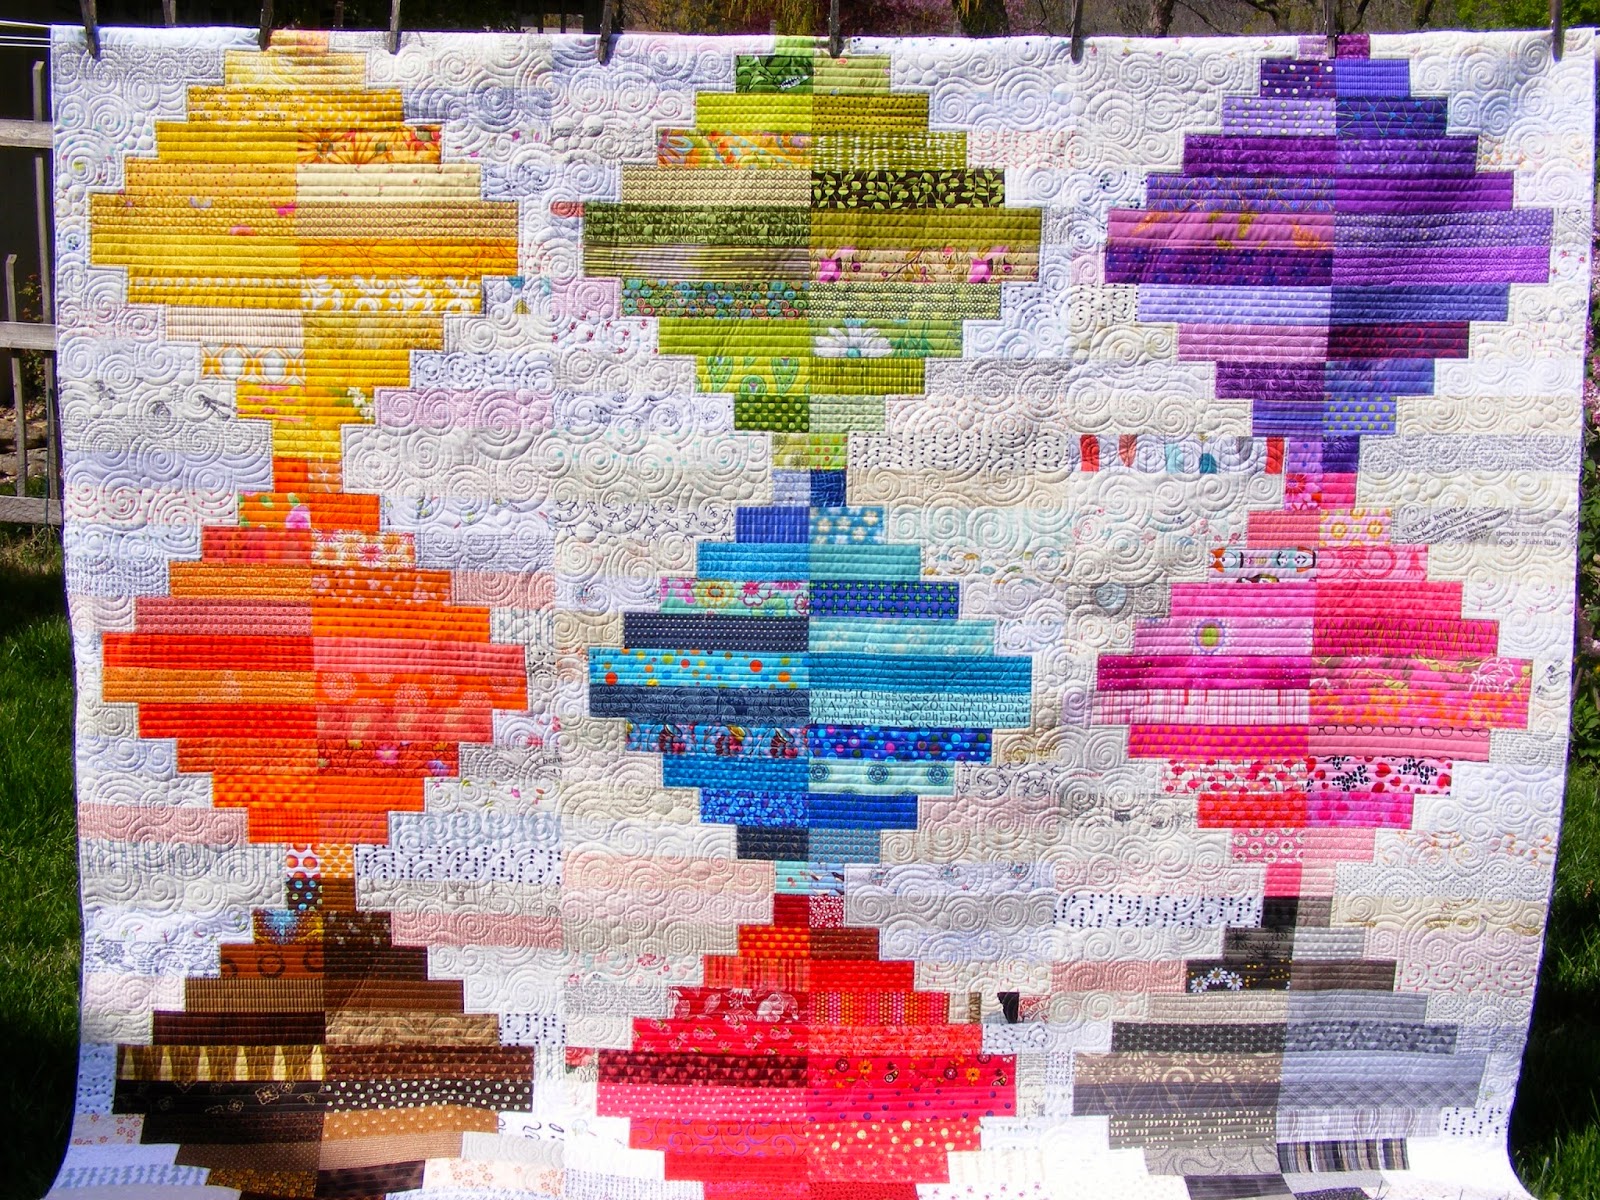
I got to work on some UFO projects too! I FINALLY finished this quilt. I think I have been working on it since 2010. I went to some workshops with Gwen Marston in Dallas and she taught baskets and calling all your blocks to a quilt. After futzing around with this quilt for almost 5 years I just worked it into a medallion and I am very happy with it.


Jenny came in to visit us the last day and the poor lady was as sick as a dog. But she was so sweet to pose with me and my quilt.


See...isn't she neat. Larger than life really. 


Here is my top all finished. I have since quilted AND bound it. I will blog about it with lots of pictures soonish.


I also made a Sew Together Bag. I bet you have seen this bag on Instagram? I have had the pattern for ages, but I need some time away from temptation to work on it. It was HARD to make. I won't lie. But kinda addictive. I used my Carolyn Friedlander Altura blocks for the body of the bag and I am just in love with this little bag. I kinda want to make a million now that I know how.


Shea was working on this AWESOME star wars quilt. My youngest hopes desperately I will make him one too. It is based on a cross stitch pattern. And I think it is brilliant. So is Shea.


Lori made this adorable Easter Basket. She modified the 1 hour basket tutorial. I love it and wish I would have made some for my kids to have Sunday for Easter. Oh well, maybe next year?


Finally the only other project I took a picture of was Sarah's Jayhawk quilt top. She had taken a workshop with Shannon Brinkley and used that style to make this top.

OK, I have just a bit of quilting left to do on a raw edge leaf quilt and then I will post a tutorial. Gird your loins folks...I am bringing back the tutorial to my blog.

xo,
Tia